If you’re searching AC installation near me in Peoria, AZ, one of the first practical questions is how long the process will take, from the first site check to the moment cool air is flowing again. The short answer is that a straightforward air conditioner installation can often be completed in a single day, but the true timeline depends on your home’s ductwork, electrical readiness, equipment type, permitting needs, and whether any upgrades are required for safe, code-compliant operation.
Below is a step-by-step timeline that explains what happens during a typical AC system installation, how long each phase can take, and what factors commonly extend the schedule.
The Quick Summary: Typical Time Ranges In Peoria
Most installations fall into one of these general ranges:
-
Like-for-like replacement (existing ducts and wiring OK): often 6–10 hours
-
Replacement plus ductwork repairs or resizing: commonly 1–2 days
-
New installation where AC didn’t exist before (or major changes): 2+ days depending on scope
-
Heat pump or variable-capacity systems with controls upgrades: may add time for setup and commissioning
Your installer should be able to estimate the timeline after evaluating the existing system, the duct condition, and the electrical setup.
Step 1: Pre-Install Assessment And Load Considerations
Typical time: 30–90 minutes (sometimes longer for complex homes)
Before installation begins, a proper assessment ensures the new system is sized and matched to the home. In hot climates, oversizing can cause short cycling and humidity issues, while undersizing can struggle during peak heat.
This step often includes:
-
Reviewing existing equipment capacity and performance issues
-
Checking duct sizing, leakage indicators, and airflow restrictions
-
Evaluating thermostat location and wiring requirements
-
Confirming electrical capacity and disconnect placement
-
Noting vent locations and any rooms with uneven cooling
If you’re comparing options while searching AC installation near me, this evaluation is what turns a “swap” into a planned upgrade that performs as intended.
Step 2: Permitting, Scheduling, And Equipment Staging
Typical time: 1–7 days (depends on scheduling and local requirements)
Permitting and scheduling happen before install day, but they still affect how long the full process takes. Some projects require permits and inspections, especially if electrical changes, major equipment changes, or new circuits are involved.
Equipment staging may include:
-
Confirming the exact model numbers and compatibility (indoor/outdoor match)
-
Ensuring the correct refrigerant type and line set requirements
-
Coordinating crane access (rare for residential, but possible)
-
Ordering or fabricating transition pieces for duct connections
Even when the installation itself is one day, this behind-the-scenes prep ensures install day runs smoothly.
Step 3: Arrival, Site Protection, And System Shutdown
Typical time: 30–60 minutes
On installation day, crews typically start by protecting floors and work areas, confirming access points, and safely shutting down and disconnecting the existing system.
This phase includes:
-
Power shutoff and safety checks
-
Protecting floors, corners, and pathways
-
Reviewing placement and clearances for indoor and outdoor units
-
Confirming thermostat and condensate drain routing
Good prep reduces delays later, especially when tight attic access or garage mechanical rooms are involved.
Step 4: Removing The Old System
Typical time: 1–3 hours
Removal speed depends on where your equipment is located and how the previous system was installed. Attic units, tight closets, or cramped side yards can slow this down.
Removal usually includes:
-
Recovering refrigerant (required for safe handling)
-
Disconnecting refrigerant lines and electrical
-
Removing the indoor coil/air handler or furnace coil
-
Removing the outdoor condenser
-
Disposing or staging equipment for haul-away
This phase often reveals hidden issues like damaged duct connections or improper drain slopes, which can add time if they need to be corrected.
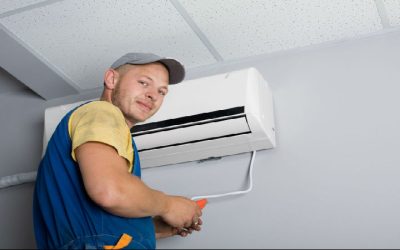
Step 5: Setting The New Indoor Equipment And Coil
Typical time: 1–3 hours
The indoor portion of an air conditioner installation is more than “placing a box.” It must be aligned with ductwork, sealed properly, and set up to drain condensation correctly.
This step can include:
-
Building or adjusting a plenum/transition
-
Sealing connections to reduce air leakage
-
Ensuring proper condensate drain slope and safety switches
-
Checking attic platforms or hanging supports for stability
-
Installing or adapting filtration and return-air components
If duct modifications are needed, this is one of the most common reasons a job extends beyond a single day.
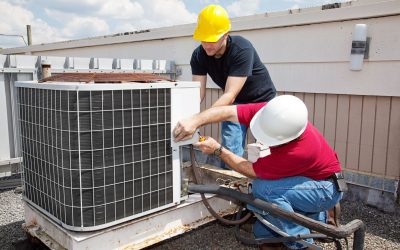
Step 6: Setting The Outdoor Condenser And Refrigerant Line Work
Typical time: 1–3 hours
The outdoor unit needs correct placement for airflow, service access, and line routing. Line set work is especially important for long-term performance.
Tasks may include:
-
Setting a level pad or verifying the existing pad
-
Running or reconnecting refrigerant lines (line set)
-
Insulating suction lines properly
-
Pressure testing for leaks
-
Pulling a vacuum to remove moisture and air before charging
Skipping proper evacuation and testing can lead to premature failures, so this phase is critical, even if it adds time.
Step 7: Electrical Connections And Thermostat Setup
Typical time: 45–120 minutes
Electrical and controls work can be quick or complex depending on your existing setup. If the disconnect, breaker sizing, or wiring needs updates, it can extend the install.
This stage often includes:
-
Verifying breaker size and wire gauge
-
Installing or updating disconnects and whips
-
Configuring thermostat wiring and system settings
-
Checking blower speed, staging, and safety controls
If you’re installing a two-stage or variable system, correct thermostat configuration can take longer, but it’s worth it for comfort and efficiency.
Step 8: Startup, Commissioning, And Performance Testing
Typical time: 60–120 minutes
This is where a quality AC system installation is confirmed. Commissioning helps ensure the system is delivering correct airflow, correct refrigerant charge, and stable operation.
Key checks include:
-
Measuring temperature split across the coil
-
Confirming refrigerant charge by manufacturer method
-
Verifying airflow and static pressure
-
Testing condensate drain function
-
Checking thermostat operation and cycle behavior
-
Ensuring the outdoor unit has proper airflow clearance
This phase can’t be rushed if you want reliable performance through Peoria’s hottest weeks.
What Can Add Time To A New AC Installation?
Even with good planning, certain factors commonly extend the timeline:
-
Ductwork repairs, resizing, or sealing
-
Electrical upgrades (panel issues, breaker changes, new circuits)
-
Line set replacement due to incompatibility or damage
-
Tight attic access or challenging equipment locations
-
Adding filtration, zoning, or smart thermostat upgrades
-
Permitting and inspection coordination
If your home has comfort issues like uneven cooling or weak airflow, it’s often better to address them during installation rather than carrying them into the new system.
A Practical Next Step If You’re Planning Installation In Peoria
If you’re comparing options for AC installation near me, ask for a written timeline that includes removal, set-in, line work, electrical, and commissioning, so you know what “install day” really involves. For a planned, code-compliant air conditioner installation with clear expectations, they can coordinate reliable HVAC installation through Always Fair Heating & Air and outline what steps may affect the schedule in your specific home.